Pro
Live Session
Upload photos directly from your camera and display them in real time to your clients.
Pro This feature is available exclusively on the Pro plan. Upgrade to Pro →
With Live Session you can connect your camera to your Mac and have photos upload automatically to ChooseYourPictures as you shoot. Your clients see the photos appear in real time on their iPad or any browser, and can start selecting their favorites instantly.
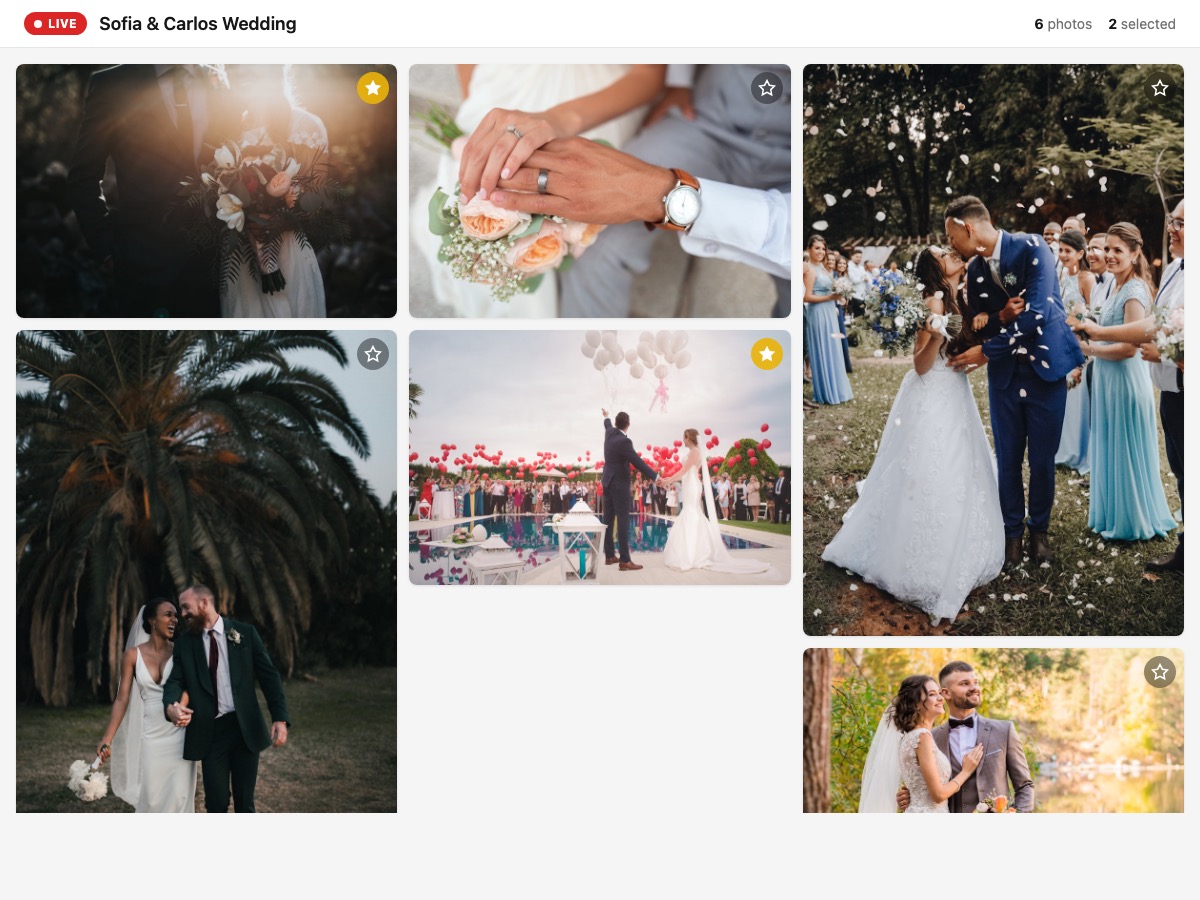
Live gallery — your clients see photos appear in real time
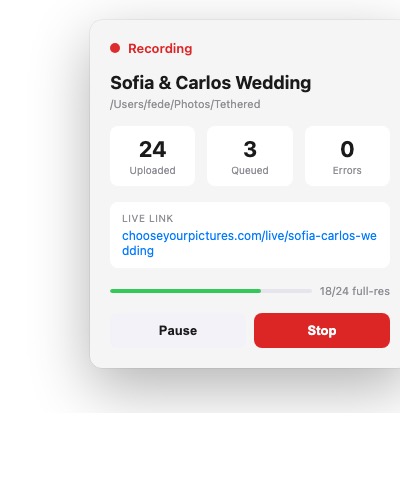
Mac app — control the session from your menu bar
Download ChooseYourPictures Live for Mac
Requires macOS 13 (Ventura) or later
How it works
- Connect your camera. Use USB tethering or FTP so your camera photos land in a folder on your Mac.
What camera do you use? Pick your brand to see the detailed steps.
Menus may vary slightly depending on your exact camera model — look for options with similar names.
On your camera
- Press MENU and open the Communication functions tab (or Wireless features on older models).
- Select Choose USB connection app → Photo Import/Remote Control.
- Connect the camera to your Mac with the included USB-C cable and turn it on.
On your Mac
- Download EOS Utility from usa.canon.com/support/eos-utilities (choose your model and macOS).
-
Open the
.dmgfile and drag EOS Utility into the Applications folder. - Open EOS Utility; the camera will appear in the list. Click Pairing or select it to connect.
- In the main window, click Preferences (button at the bottom left).
- Go to the Destination Folder tab, click Browse, and pick the folder where you want your photos to land.
- Open the Remote Shooting tab (inside Preferences) and confirm captured photos save to that same folder.
- Close Preferences and click Remote Shooting (or Download Images) in the main window to start.
Now that your photos land in a folder on your Mac, continue with step 2: open the EscogeTusFotos Live app.
Prefer WiFi/FTP? See Canon's official guide.
Menus may vary slightly depending on your exact camera model — look for options with similar names.
On your camera
- Press MENU and open the Setup menu (wrench icon).
- Look for USB or USB Data Connection and confirm it's set to MTP/PTP (the default).
- Connect the camera to your Mac with a USB-C cable and turn it on. (First-generation Z6/Z7 use micro-USB instead.)
On your Mac
- Create a free Nikon ID account at downloadcenter.nikonimglib.com (required to download).
- Download NX Tether for macOS from downloadcenter.nikonimglib.com.
-
Open the
.dmgand drag NX Tether into Applications. - Open NX Tether; your camera will appear in the list — double-click it to connect.
- Click the Destination button in the main window.
- Choose Computer + Card (saves to your Mac and the camera's card).
- Click Browse and pick the folder where you want the photos to arrive.
Now that your photos land in a folder on your Mac, continue with step 2: open the EscogeTusFotos Live app.
Prefer WiFi/FTP? See Nikon's official guide.
Menus may vary slightly depending on your exact camera model — look for options with similar names.
On your camera
- Press MENU → Network → Cnct./Remote Sht. → Remote Shoot Function.
- Set Remote Shooting to On.
- Open PC Remote Cnct Method and select USB.
- Connect the camera to your Mac with the USB cable and, if prompted, choose Remote Shooting on the camera screen.
On your Mac
- Download Imaging Edge Desktop (the full bundle) from Sony — Imaging Edge Desktop.
-
Open the
.dmgand install all three apps (Remote, Viewer, Edit). - Open Remote from Applications.
- In the device selection window, double-click your camera to connect.
- In the operations panel on the right, open the Save in panel (also called Image Save Settings).
- Click to choose the destination folder where photos will be saved.
- In the same panel, choose PC+Camera to also keep the original on the camera's card.
Now that your photos land in a folder on your Mac, continue with step 2: open the EscogeTusFotos Live app.
Prefer WiFi/FTP? See Sony's official guide.
- Open the ChooseYourPictures Live app. The app lives in your menu bar. Log in with your ChooseYourPictures account, enter the client name, and select the folder where photos arrive.
- Start the session. Clicking Start creates the gallery and the app begins watching the folder. Each new photo uploads automatically.
- Share the link. The app shows a unique link you can open on an iPad or any device. Photos appear in real time with a smooth animation.
- Live selection. Your clients can mark their favorites while the session is active. Clicking the star or pressing Enter in full view marks the photo as selected.
- End the session. Clicking Stop in the app converts the live gallery into a normal selection gallery with watermark. Selections made during the session are preserved.
Smart upload
The app first uploads a 2000px preview so the photo appears quickly in the gallery. In the background, it uploads the original file at full resolution. This way your clients see photos instantly without waiting for the RAW or high-resolution file to finish uploading.
Requirements
- Mac with macOS 13 (Ventura) or later.
- Camera with USB tethering or FTP to a local folder.
- Stable internet connection to upload photos.